Photo by Ekaterina Bolovtsova from Pexels
This post contains affiliate links. I may receive a commission if you make purchases using the links at no extra cost to you. See disclaimer.
Are you about to start a WordPress blog but just don’t know where to begin? This article will help you create a great WordPress blog using Namecheap’s EasyWP.
If you are reading this, chances are: you’ve finally made up your mind to start a blog or just here to see if you can do this before making up your mind.
Either way, you will find that starting a blog these days is one of the most natural things you can do.
If you can use an ATM or sign up for any social media platform, you can start a WordPress blog.
Even if you can’t do any of those, as long as you can read and follow simple instructions, by the time you are done reading this, you will be a proud owner of a brand new, good-looking WordPress blog.
Shall we begin? Not yet. You may be wondering what a self-hosted WordPress blog is, how it is different from any other blog, or why you should create a blog with EasyWP.
We’ve got you covered. You will get the answers to all those questions and more in the article: Why you should Start a Blog on EasyWP .
.
For now, let’s get right into the business of giving you a spanking new WordPress blog that will not only be appealing to the eye but also positioned to make you money and get you more customers if you have a real business.
Even if all you want is a place to publish your personal opinion about a particular topic or an issue that has built a house in your brain, you’ll have a blog to do that in no time.
Let’s get started.
Secure a Domain Name
The first thing your blog needs is a domain name. It is an essential part of your blog identity.
Your domain name has to be unique and easy to remember—for example, Kemisblog.com, Electronicsdiary.com, or lindaikejisblog.com. You could use your name or your business name.
But don’t make it too long and complicated.
I’ve seen long but straightforward names — names like makingsenseofcents.com, for example. It may be a bit long, but it’s also straightforward and easy to remember. So consider using something similar if you don’t mind going long.
Once you’ve chosen your blog name, the next thing you want to do is register that name. Now you have to pay a domain name registrar for the registration of your blog name ( that is, your domain name).
To do this, head over to NameCheap’s domain registration portal to search for your domain name and get it registered.
- Go to www.namecheap.com

- Enter your domain name in the search bar and click on the search button.
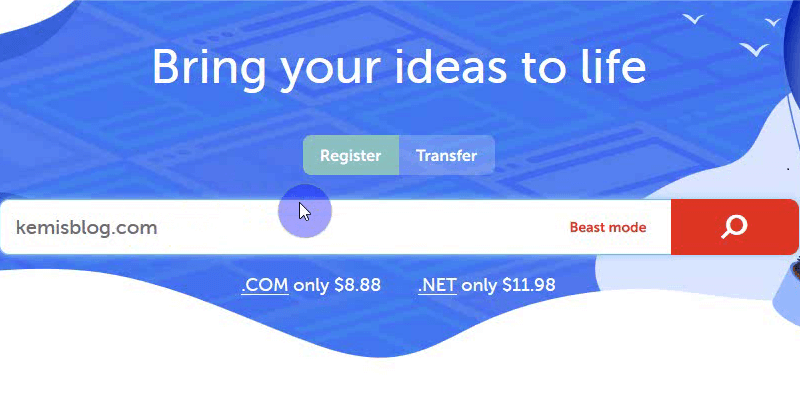
- The following interface will present a list of available extensions (that is, .com, .org, .net, etc.) for your domain.
- Select the preferred by clicking on the “Add to cart” (or the cart icon) button next to it. I recommend using a .com extension for your blog.
- Now, proceed to checkout.
We have to double-check the list of items and the amount of money we are paying before we confirm the payment.
You should be paying for two items: Domain name (or Domain registration) and WhoisGuard.
- Once you’ve confirmed the items and the total amount, click on confirm order.
You are going to have to sign up for a Namecheap account if you don’t have one.
- Now complete the account creation form.
- Enter the needed details. Please remember to use a secure password. (Copy that password because you will need it to sign up for the managed WordPress hosting service.)
- The email you choose to enter should be active.
- Once you complete the form, click on Create Account and Continue.
- The following interface will present you with a form for your contact details.
- Enter the correct contact details. Be sure to double-check to avoid mistakes. If you are not sure of your Zip code or postal code, just google it or ask a friend.
- Use the dropdown to select the appropriate mobile phone code for your country, then enter your phone number to complement the mobile phone code.
- Confirm your details and click on continue.
- Once the next interface shows, confirm your details, save them as default checkout settings, and click on Continue.
- Now add a payment method: this is where you will enter the details for the credit/debit card you will be using for all your Namecheap payments.
- Now customize your auto-renewal options: check the appropriate boxes to enable auto-renewal or uncheck them to disable the feature.
- Gladly click on Continue.
At this point, Namecheap will process your order. Wait for it to finish.
If the transaction was successful, then you have successfully purchased a domain name for your new blog.
Now that we have a domain name, we need a place where the website files will be hosted (or stored).
You need space on a webserver to store your website files. Examples of such files include videos, images, texts, and the source code created for your blog.
No need to panic. You don’t have to worry about managing web hosting or putting all these things in place because this is where Namecheap’s EasyWP comes in.
EasyWP allows you to connect your domain name to the server that will host your website data in a few simple clicks.
Let’s head over to the EasyWP managed hosting platform to set up hosting for our new WordPress blog.
We have finished with the first part of the blog creation process. You can grab a plate of yogurt if you want.
Now let’s move on to the second part. Don’t worry. You will soon be a proud owner of an excellent WordPress blog.
Sign up for EasyWP (WordPress Installation)
Now that your yogurt is busy getting digested, head over to the EasyWP website . Use my link
 to get your first month free.
If you are using my link to get started for free , skip the next three steps.
- Scroll down to where you have the WordPress hosting
 plans itemized.
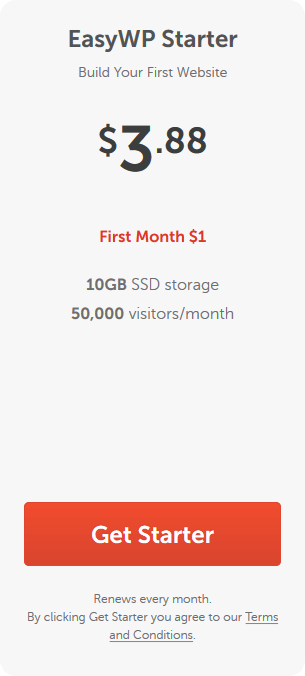
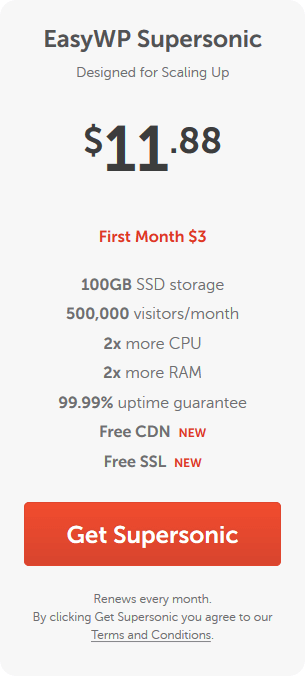
The two essential things you need to look at before choosing any EasyWP plan will be the price and the monthly visitors.
If you are new to blogging , the starter pack will do just fine.
- Now choose the preferred plan.
If you are logged out of Namecheap, you will be required to log in. You can log in using your Namecheap username and password we used for the Namecheap account we created in the previous session.
- You could also create a new Namecheap account
 if you don’t have one.
 - Now select a payment method. It should be the same as the one you used in the previous session. If you have never added a payment method, select the option that will allow you to add a new credit/debit card.
- Now click on the confirm payment button.
The next thing we’ll do now is to connect that lovely domain name we bought in the first section.
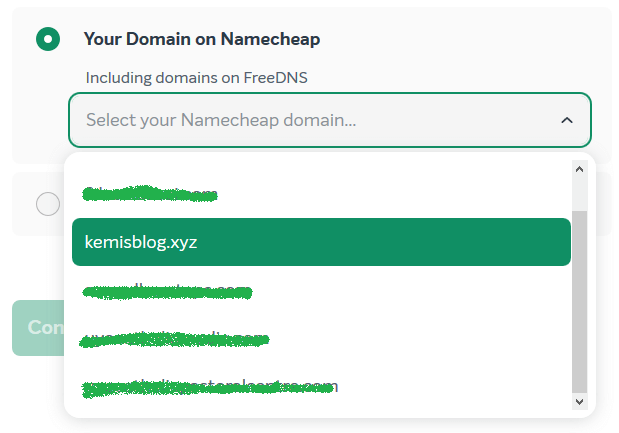
- Select your preferred domain from the dropdown (list).
- Click on Continue
- Skip the choose plugins step
- If you are okay with the details on the review page, just hit the continue button.
Now, wait for a few seconds for EasyWP to create your WordPress website. You’ll get a notification when it’s done.
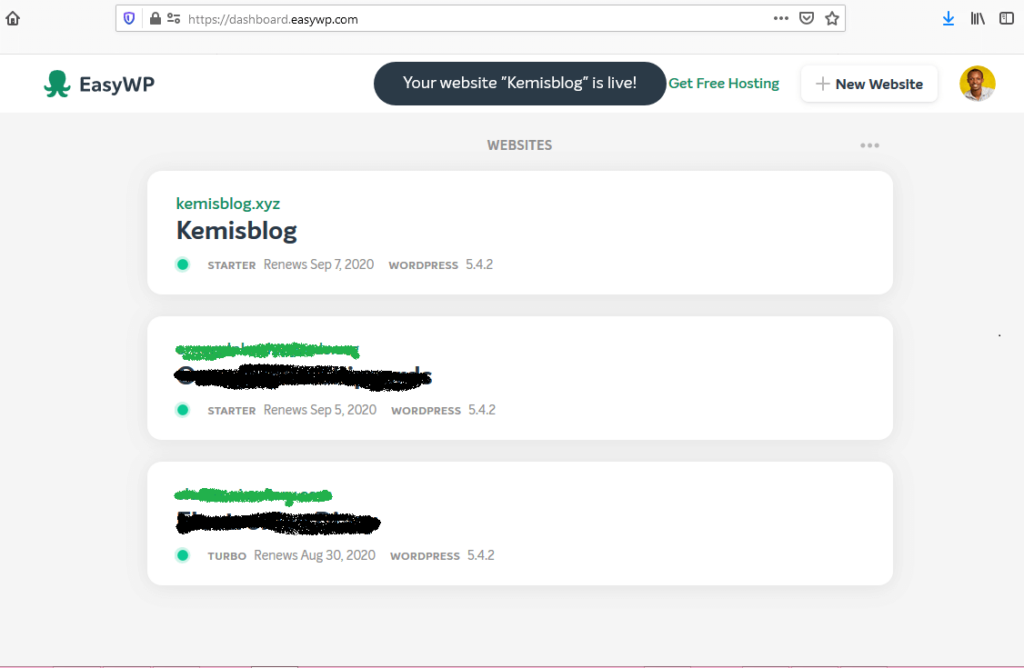
You could view your website now, but you will get a blank page.
- Click on the green dot to finish the setup.
(If you have not yet purchased a domain name or already have a domain name with another registrar, please select the second option.)
If you are not connecting a domain name, your WordPress site will go live instantly. If you are connecting a domain name, follow the next step.
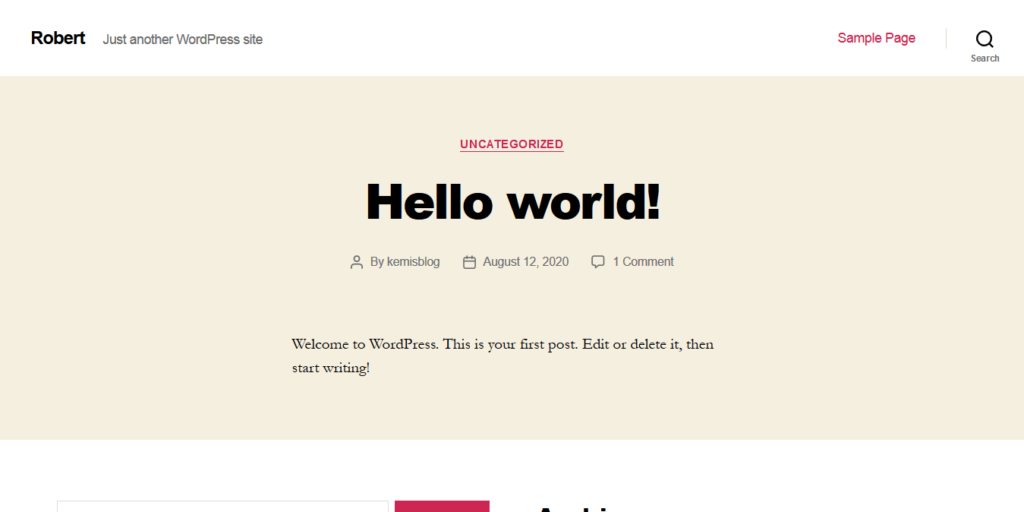
- Now, wait for Namecheap to finish connecting your WordPress website to your domain name — this will take 20 minutes, tops.
- After 15 – 20 minutes, load your website again. You should get a page looking like what you have below.
Great!
Now that you have installed WordPress on EasyWP, the last thing will be to set up and design your WordPress blog.
Let’s get into it.
Set up and Design Your Blog
The first time you log into WordPress, the dashboard can be pretty overwhelming. You will find a video somewhere before the end of this article that will give you an overview.
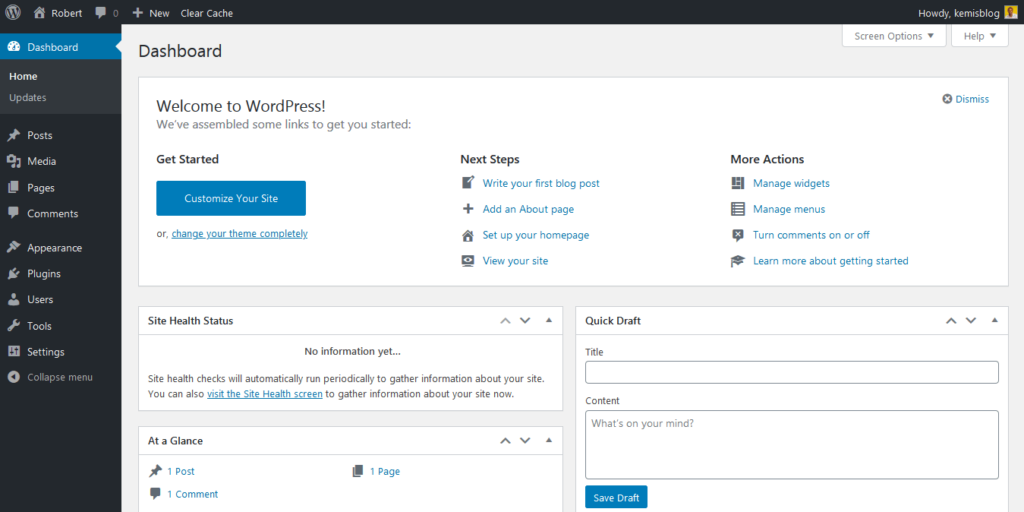
To access your WordPress dashboard, enter your site URL with a “wp-admin” slug. For example, blogname/wp-admin.
Check your email for your EasyWP username and password if you are prompted to log in.
Alternatively, click on the Admin button on your EasyWP dashboard .
.
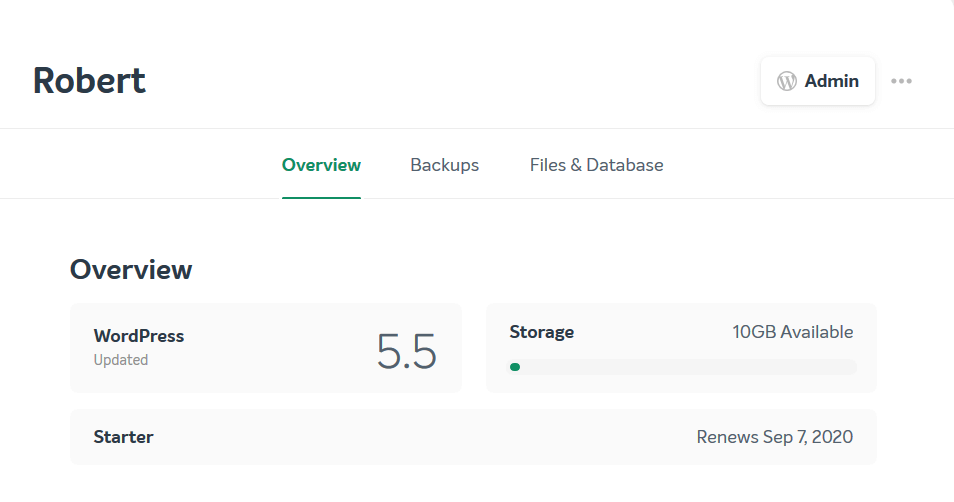
For now, let’s see how to install themes and plugins after creating your blog on Easy WP.
Themes
A theme captures the overall look and feel of your WordPress website. Installing a theme is easy. Let’s dive right into it.
How to Install a theme for your WordPress website
- Select the Appearance tab on your WordPress dashboard
- Now click on the Add New button (next to “Themes”)
- You will find several themes and corresponding snapshots. Choose any of the themes you wish to install.
You could search for a theme you know using the search bar or simply preview any theme you like by clicking on it. A preview will tell you more about the theme’s features and functionality.
If you don’t want to preview the theme, just go ahead and install it.
- Click on install and wait for it to finish.
- Click on Activate
After activation, view your blog. You will find that the new theme is now live. To customize your new theme, click on customize under the Appearance tab.
Theme Recommendations
The FuturioWP is a fantastic option for your blog. Its default theme is free, and it also has other great premium themes you can choose from.
Suppose you like drag and drop options. FuturioWP works well with Elementor .
.
But if you can afford to pay for a theme — and I highly recommend you do so — then you go for either Elementor or Divi by Elegant themes
 . I recommend these two options because they have a vast collection of professionally crafted designs.
And if you like touching things now and then, the drag and drop interface offered by Elementor and Divi are unbeatable.
You can do anything with your mouse without writing a single character of code.
If you ever need help customizing your theme, please drop a comment or hire me .
.
Plugins
Plugins extend the functionality of your WordPress site. There are plugins for displaying related posts, share buttons, comments, and pretty much anything.
Too many plugins will also slow down your WordPress site so, use them wisely.
How to install a plugin on WordPress
- On your WordPress dashboard, head over to where you have plugins and click on it.
- Click on the Add new button at the top
- Now locate the search bar (on the right) and type a name for the plugin. Example “Google Analytics”
- Select Install Now
- Select the Activate button to activate the plugin
To make use of a plugin or edit its settings, go the plugins tab on your WordPress dashboard.
Not sure which plugins to install on your new WordPress Blog? There is a superb list of plugins put together by ELITE BLOG ACADEMY®.
Now get that list of plugins from EBA® and you won’t regret it. Here is the link: 20 free WordPress Plugins .
.
Although I don’t use as much as 20 plugins for this website, that list will provide you with the best set of free plugins to get you started.
Now that you are ready to rock the world of blogging let’s get you started on the WordPress dashboard.
I stumbled on two videos that will be of great help. The first is this video on how to publish your first blog post by Ryan.
You should also take a look at The Ultimate Guide to the WordPress Dashboard by Godaddy Guides. You can watch this one here. (This video is used here under creative commons license from Godaddy)
Frequently asked questions by EasyWP users
You can install an SSL certificate by connecting your WordPress site to Cloudflare . It’s free! I don’t recommend using Namecheap’s CDN or buying an SSL certificate.
For starters, you can start a WordPress blog on EasyWP for just $10.06. If you use my link to get one month for free , you are only looking at $9.06.
There is no one size fits all solution to this problem, but the following suggestions will help. Bluehost is the best hosting company out there for WordPress blogs. But you will have to pay for at least 12 months of hosting to get started. If you have the money, go for Bluehost
 .
.
On the other hand, you will do just fine with EasyWP if you don’t want to spend much at the moment. It takes only $10.06 to get started on EasyWP and $3.88 to renew if you go for the starter plan . They also allow monthly payments. But that also means you will be the one to install and update your SSL certificate.
Related Articles
- The discoveries that Distinguish Successful Bloggers
- Why you should start a WordPress blog on EasyWP
- The Successful Blogger’s Arsenal
Now that your blog is up and running, you still need up-to-date information on how to succeed and make money blogging .
.
Sign up for our free newsletter below to get more tips on how to manage your WordPress blog.
